

A few subtle changes make the difference between a dull picture and one ready for printing or exhibiting. Photo editors such as Affinity Photo, Photoshop, and Luminar AI compete in offering smart automatic adjustments and tools for controlling the tiniest detail of the image. Fixing exposure, contrast, color, and white balance are the most frequent adjustments a photographer does. When it comes to adjusting contrast, you want quick fixes and manual tools at the same time. Here are Affinity Photo’s most useful features to enhance contrast.
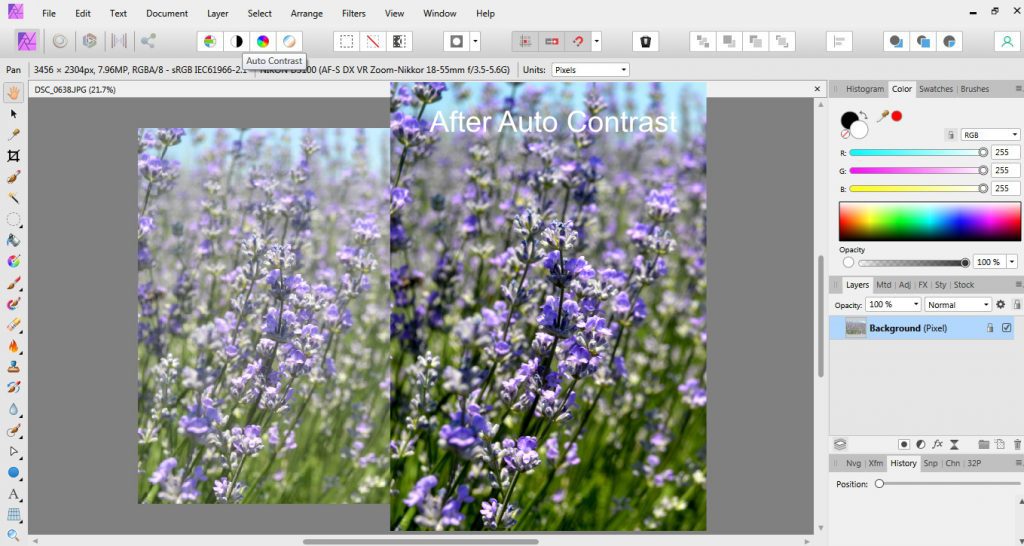
Auto Contrast Tool
If you are in a hurry or your image doesn’t need much to be perfect, the Auto Contrast tool is what you need. Instead of adjusting the contrast yourself, you let the editor decide what’s best for your image. In most cases, the editor won’t be wrong.
To use the Auto Contrast tool, click on the Auto Contrast icon in the main toolbar. The tool applies changes to the selected layer. If you want to make non-destructive adjustments, duplicate the background layer before starting the editing process (right-click on the Background layer and select Duplicate).
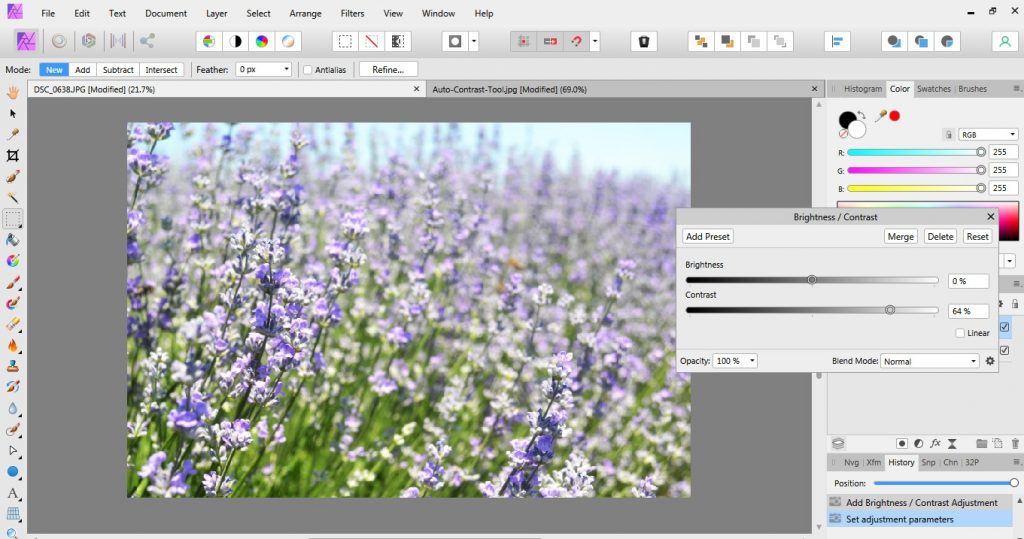
Brightness / Contrast Tool
Affinity Photo has a dedicated tool for adjusting the contrast manually. It is called the Brightness / Contrast tool, and it comes as an Adjustment layer, meaning it automatically creates a new layer on which it applies the changes.
The Brightness / Contrast tool allows you to adjust the contrast in a range between -100% and +100%. It also allows you to set the opacity and blending mode for the new Adjustment layer. The changes are visible in real-time, thus take your time and experiment.
To use the Brightness / Contrast tool, go to Layer -> New Adjustment Layer -> Brightness / Contrast. In the tool panel, drag the Contrast slider to add more contrast.
Levels Tool
The Levels tool is slightly more advanced than the previous two features of Affinity Photo. It allows you to stretch the tonal range of the image by visualizing the histogram and deciding the black and white levels. You can work on each color channel (R, G, and B) or the master RGB channel. You can also choose other color spaces than RGB (i.e., Gray, CMYK, and LAB).
The best contrast an image can have is translated into a complete tonal range, starting with pure black pixels and ending with pure white pixels. Therefore, the first thing you need to do for enhancing contrast is to make sure the black and white levels are the histogram’s endpoints.
To use the Levels tool, go to Layer -> New Adjustment Layer -> Levels… Select the RGB color space and the Master channel. Drag the Black level slider until it reaches the left end of the histogram and the White level slider until it reaches the right end of the histogram.
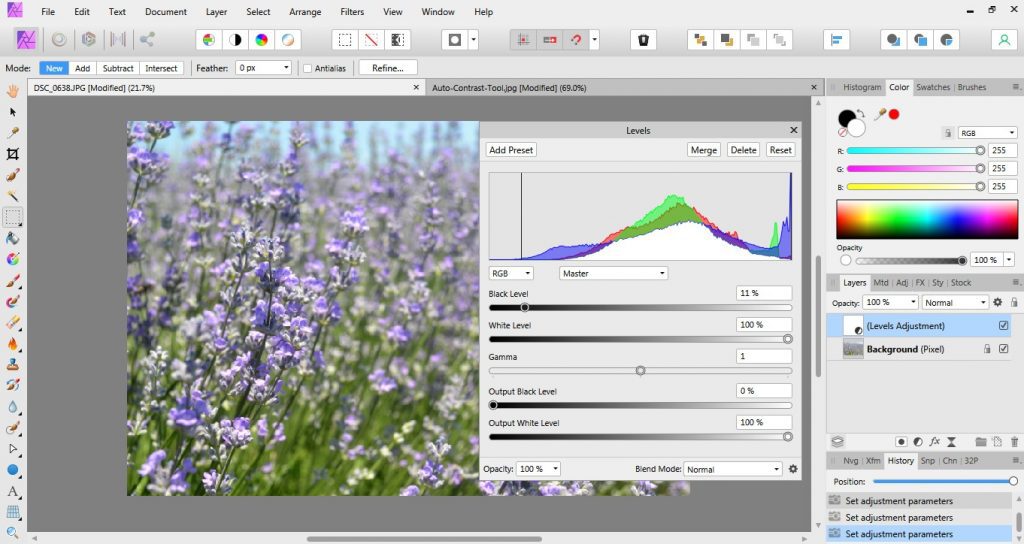
Note: There is also an automatic adjustment for fixing Levels called Auto Levels. You’ll find it in the main toolbar, next to the Auto Contrast tool.
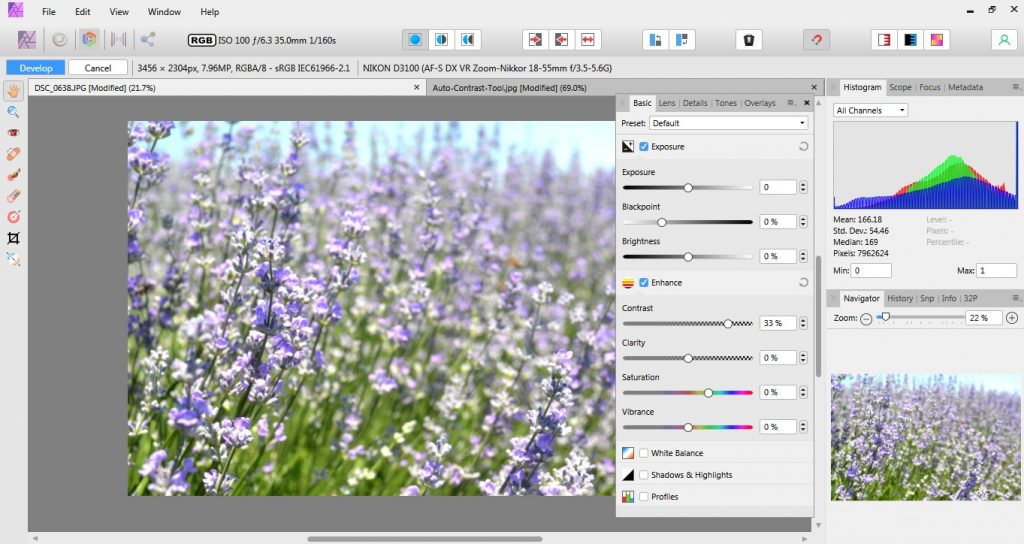
Develop Persona – Enhance Contrast
For enhancing contrast in RAW images, Affinity Photo has the Develop Persona workspace. The Contrast tool is in the Basic panel, Enhance category. It is a slider going from – 50% to 50%. You can see the results in real-time and mix the contrast adjustment with other adjustments such as clarity, shadows and highlights, detail refinement, etc.
Affinity Photo offers several methods for enhancing contrast. Choose the one that fits your editing skills and remember to keep your adjustments simple, subtle, and natural-looking. Even though you can fix mistakes in post-processing, aim to capture the perfect shot directly in the camera.