


Rain isn’t the most popular forecast for photographers. While it’s challenging and pretentious, rain is also a moment for artistic compositions, dramatic moods, and unique photographs. Learn how to master rain photography and your portfolio will be rich and stylish.
Rain isn’t the most popular forecast for photographers. While it’s challenging and pretentious, rain is also a moment for artistic compositions, dramatic moods, and unique photographs. Learn how to master rain photography and your portfolio will be rich and stylish.
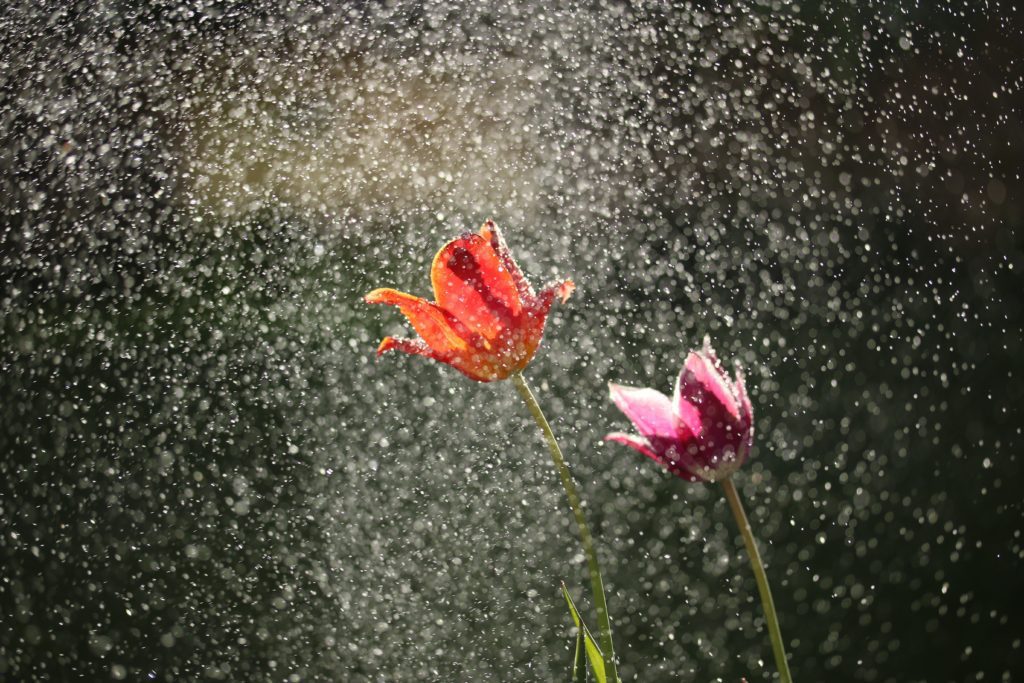
First of all, you need to be fast and efficient because the shooting conditions keep changing. You also need to be in control of your camera and know to take pictures in low light conditions. Here are the basic settings for your camera that will help you take amazing rain pictures:
Use a fast shutter speed
Raindrops are small moving objects and they need a high shutter speed. To freeze the frame exactly as you see it use fast cameras and the highest shutter speed available. Especially if you do street photography or document an event, short exposures help you deliver sharp images. But rain photography also refers to landscapes, portraits, and wildlife. So you need to experiment with slow shutter speeds as well and see if the long exposure effect suits you best. Nevertheless, don’t use exposures too long (more than 1 second) in heavy rain because you’ll miss all the details.
Increase ISO
Rain offers low light conditions, especially during the night. Use a camera that performs well in these conditions and offers a wide dynamic range. In order to afford a fast shutter speed, you need to increase the ISO to a medium or high value depending on the light. Don’t overdo it, high ISO causes noisy images.
Use a deep depth of field
Rain pictures need to have everything in focus. Use a small aperture to have a deep depth of field. On the other hand, a aperture allows more light coming into the camera and helps you keep the shutter speed high. Try different values for aperture until you get the perfect balance between depth of field and shutter speed.
Use manual focus
Don’t let the camera take control. You can use it in shutter speed mode or manual mode and control exposure and focus by yourself. Manual focus allows you to focus exactly on the small detail you want to photograph. If the scenery’s dynamic range exceeds the camera’s possibilities, you can choose to focus on brighter areas and under-expose the darker areas or vice versa. By doing this you influence the general mood of the image.
Control the flash intensity
Flash is a common light source for the focal point of your pictures. But using the flash at maximum intensity can ruin the scenery’s colors and reduce the background to black. Especially for portraits, use the flash in manual mode and control its intensity. Take several pictures until you find the right value.
Raindrops can use a flash as a light source as well. U they look better with the source of light behind them. Use an external flash or a reflector if you don’t have other sources of lights available. For urban snapshots use street lights or illuminated windows. Don’t forget to bring a tripod.
Rain photography transforms common subjects in amazing pictures. It requires creativity and technical skills, but it also teaches you a lot about what being a photographer really means. As someone once said, life is what happens when you’re making plans. Go out and take pictures in any weather and at any hour of the day. See life as it is, watch its transformations, and tell real stories. All you need is a camera.
To follow up on this article check out Taking Photos in the Rain.